If you’ve been brought here by the link in my Instagram then you’ve probably noticed I’ve been posting more often recently.
I’ve been taking a set back from social media for a while now, but I’m feeling more mental clarity and overall in a much more positive state of mind. And with that I feel like posting more of my art again.
I’ll be updating Instagram frequently, several times throughout the week, and I will occasionally make a post here with some pieces that are more experimental or fall outside the Sci-Fi genre, which is what I hope to keep mostly on Instagram.
Thanks for visiting my website and check back once in a while, I appreciate you!
Sometimes I can get so discouraged! When I look at other peoples art and I get inspired to create something of my own, sometimes my own work doesn’t meet my expectations. That can be pretty disappointing.
There will be many obstacles on each persons art journey, no matter the person or the medium. Each challenge presents itself in a unique way and no two people will have the same situations to consider. When it feels like progress is slowing down to a grinding halt, and there’s no more progress being made between projects, it can be disheartening and frustrating.
Plateauing in skill progress is not only common, but an inevitability for all creative people. After the initial spike in progress when learning something new skill gain slows as we reveal how much work is ahead of us. Too often this results in giving up our ambitions as the valley of despair seems impossible to overcome.
This is best illustrated by the Dunning Kruger Effect.
Rest assured, if you keep pushing, you will come out of that valley. Confidence will rise again as you inventory what skills you need to hone.
Tips for overcoming an Art Plateau
Become The Observer
Between practicing, become an expert observer. Take a break from your craft to simply become the silent watcher.
Take note of professional styles and watch how they create closely, lessons are everywhere. If you spend some time to take it all in, and less time trying to output perfection, you will find yourself improving without even practicing.
Now don’t be a fool and take this as meaning you will improve by doing nothing! Being observant takes intentional effort. It’s not doing nothing. And more importantly, if you only observe and never try to put those observations to test, you won’t see improvement.
Revisit Older Pieces
If you ever feel down about being stuck in your art journey it may help to take a look at how far you’ve come. Progress is not linear, and it can help to see where you started vs. where you’re at now.
Recreating and comparing two older works can also provide perspective on how far you’ve come. Note what you improved on and what areas could still use some work.
Foremost take pride in your accomplishments. You can look back fondly on your previous work and be a champion for yourself. Each one brought you to where you are today!
Create an Action Plan
There are many options for both free and paid art lessons and programs, which can help you overcome issues regarding skill plateaus. Create your own by modifying these programs to fit your needs or find one that’s been curated to fit your desired path.
Here are some of my favorite free YouTube channels for building out my own career development path:
With 2024 right around the corner one of the things on my mind has been my art journey over the years, how far I’ve come, and what it took to get where I am now. The progression felt slow, like I wasn’t really improving in my art fundamentals and skill set.
In 2021 I completed a New Year’s resolution for the time at the ripe old age of 27. It wasn’t easy, I’d never tried to do 30 days on a Keto diet or any dietary plan. I didn’t go more than the one month of keto, but I completed my short goal. I lost a good amount of weight that I was able to keep off with a more balanced post keto diet. And I proved to myself I could make a difficult change in routine and keep it up long enough to make a positive impact in my life.
What if I had done 30 days of 10 minute sketches? Learning a new software? Using traditional art media? 30 day New Year Resolutions are extremely underrated. A New Year’s resolution doesn’t have to last all year long!
There’re actually no rules about what your resolution commitment lengths are.
And for those of us who are working on overcoming a lack discipline, specificity allows us to create a resolution not so difficult you will never see the end but not so easy you’ll never encounter a obstacle either.
Furthermore, let’s get into the resolutions. Read through the list, and let me know which resolution you’ll be doing this year. Or maybe you are doing something not listed here? Comment and let me know what you’re up to in 2024!
10. Warm-Up Rituals:
Incorporate regular warm-up drawings into your routine. These quick exercises prepare your mind and hand for more extensive artistic endeavors. I alternate between a few techniques to warm up my hands and mind, but the most important part of warming up for me is being somewhat interested or invested in the sketches. I mean, drawing 50 straight lines, perfect circles, and ovals is effective but it will bore you to tears, so you’ll have a better time if you’re interested in the topic. The important thing is getting time with the tools in your hands for at least 10 minutes prior to proceeding to your work or practice.
09. Curate Your Reference Folder:
Dedicate less than a month to filling your reference folder. A well-organized and diverse reference collection can be a powerful asset in enhancing the depth and authenticity of your artwork. Let’s face it, your reference folders are either nonexistent, scarcely populated, or crafted entirely on Pinterest (No judgement, but perhaps we can expand beyond.)
08. Daily Doses of Creativity:
Commit to a 30-day challenge with a “Topic of Choice” series, exploring a different theme or subject every day. This not only hones your skills but also broadens your artistic horizons. If you’ve been on art communities online, you may be familiar with the popular Inktober challenge, where you’re tasked with drawing a specific subject or theme for each day of the month in October. These challenges can be a good way to do a drawing sprint, and fit as much practice into a month as possible. The pride you’ll feel after accomplishing this one will be well deserved.
07. Learn a New Technique or Style:
Set aside a month to immerse yourself in learning a new technique or exploring a different artistic style. Seek tutorials and guides for artists seeking to expand their skill set. This can be a good time to reconnect with any art styles you might’ve grown out of in childhood such as manga, anime, or chibi. Becoming skilled in a style you envied as a kid can be hugely powerful, and be a good way to acknowledge the inner child that made you want to be an artist in the first place.
06. Fuel Artistic and Personal Growth:
Pair your artistic resolutions with broader personal goals, such as waking up early or limiting screen time. You can use art as your reason to keep a routine. Plan out your day with specific goals in mind and note, how and when you will work towards achieving those goals. Art can take on many forms so don’t limit yourself to drawing when you’re working on self-improvement. Writing in a journal, poetry, songs, and slam are also great ways to express and process the stresses of life.
05. A Weekly Food Diary:
Incorporate a weekly food diary into your artistic routine. Documenting your culinary experiences through sketches adds a personal touch to your art and challenges you to explore different subject matters. Sketching meals may make you realize a pattern among your eating habits, or inspire you to try cooking something you’ve never tried before.
04. Weekly Portraits:
Embrace the beauty of portraiture by dedicating a week to create a portrait. Experiment with various styles and techniques inspired by a weekly muse. Maybe you want to draw well-known figures to practice your ability to recreate likeness and recognizably. Or perhaps you’re going through an obsession with a certain band or TV cast. There are an endless amount of beautiful subjects that the world deserves to see.
03. Weekly Masterpieces:
Adopt the “Finish a Piece a Week” mantra. This resolution not only encourages consistency but also pushes you to complete projects, helping you grow as an artist with each finished artwork. Pick a day you will start, and commit to finishing the piece within 7 days. It can help to plan what times you’ll work on the piece each day, but realistically, I think it’s better to find your groove naturally by pushing your limits and fine tuning how much you can do in each week. After one month of Weekly Masterpieces you’ll find yourself with growing confidence in your work.
02. Participate in Online Art Contests:
Extend your artistic reach by entering online art contests. Challenge yourself to follow their rules and guides to create a finished piece for the contest. This can provide exposure and motivation for certain artists. No matter your skill level participating in art contests is a valuable experience. Don’t let other people’s entries demotivate you. Exposing your art to a community willing to provide you with feedback and actionable critique is a surefire way to accelerate learning what you need to work on to reach the next level.
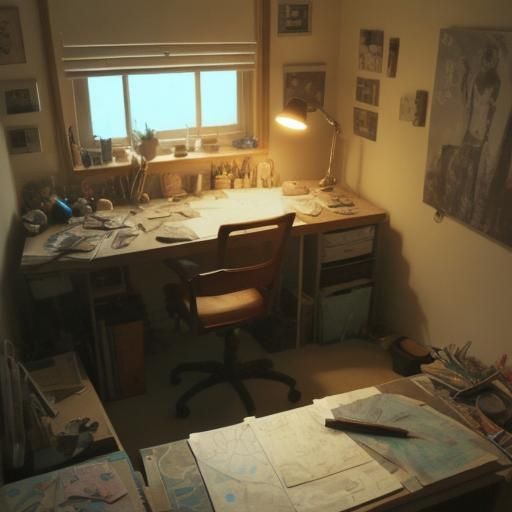
01. Upgrade Your Creative Space:
Transform your workspace in less than a month. A conducive environment can significantly impact your creativity and productivity. This resolution arguably takes the most time, effort, and resources to complete, but has the potential to impact your output immensely. Identify all the facets of your current work setup. The desks, chairs, room, hardware, canvas, tools of the trade. All the little desk toys and fidget spinners. Evaluate your living space and shift things around to create a more relaxing space to create in. Minimize distractions, and maximize your comfort. Make the space desirable to be in. When you love your work space, it’s not hard to convince yourself to be in there. The more often you’re in the space, the better it will be for your art journey.
Your resolution not listed here? Please share your artistic goals for 2024 below and let’s grow together!
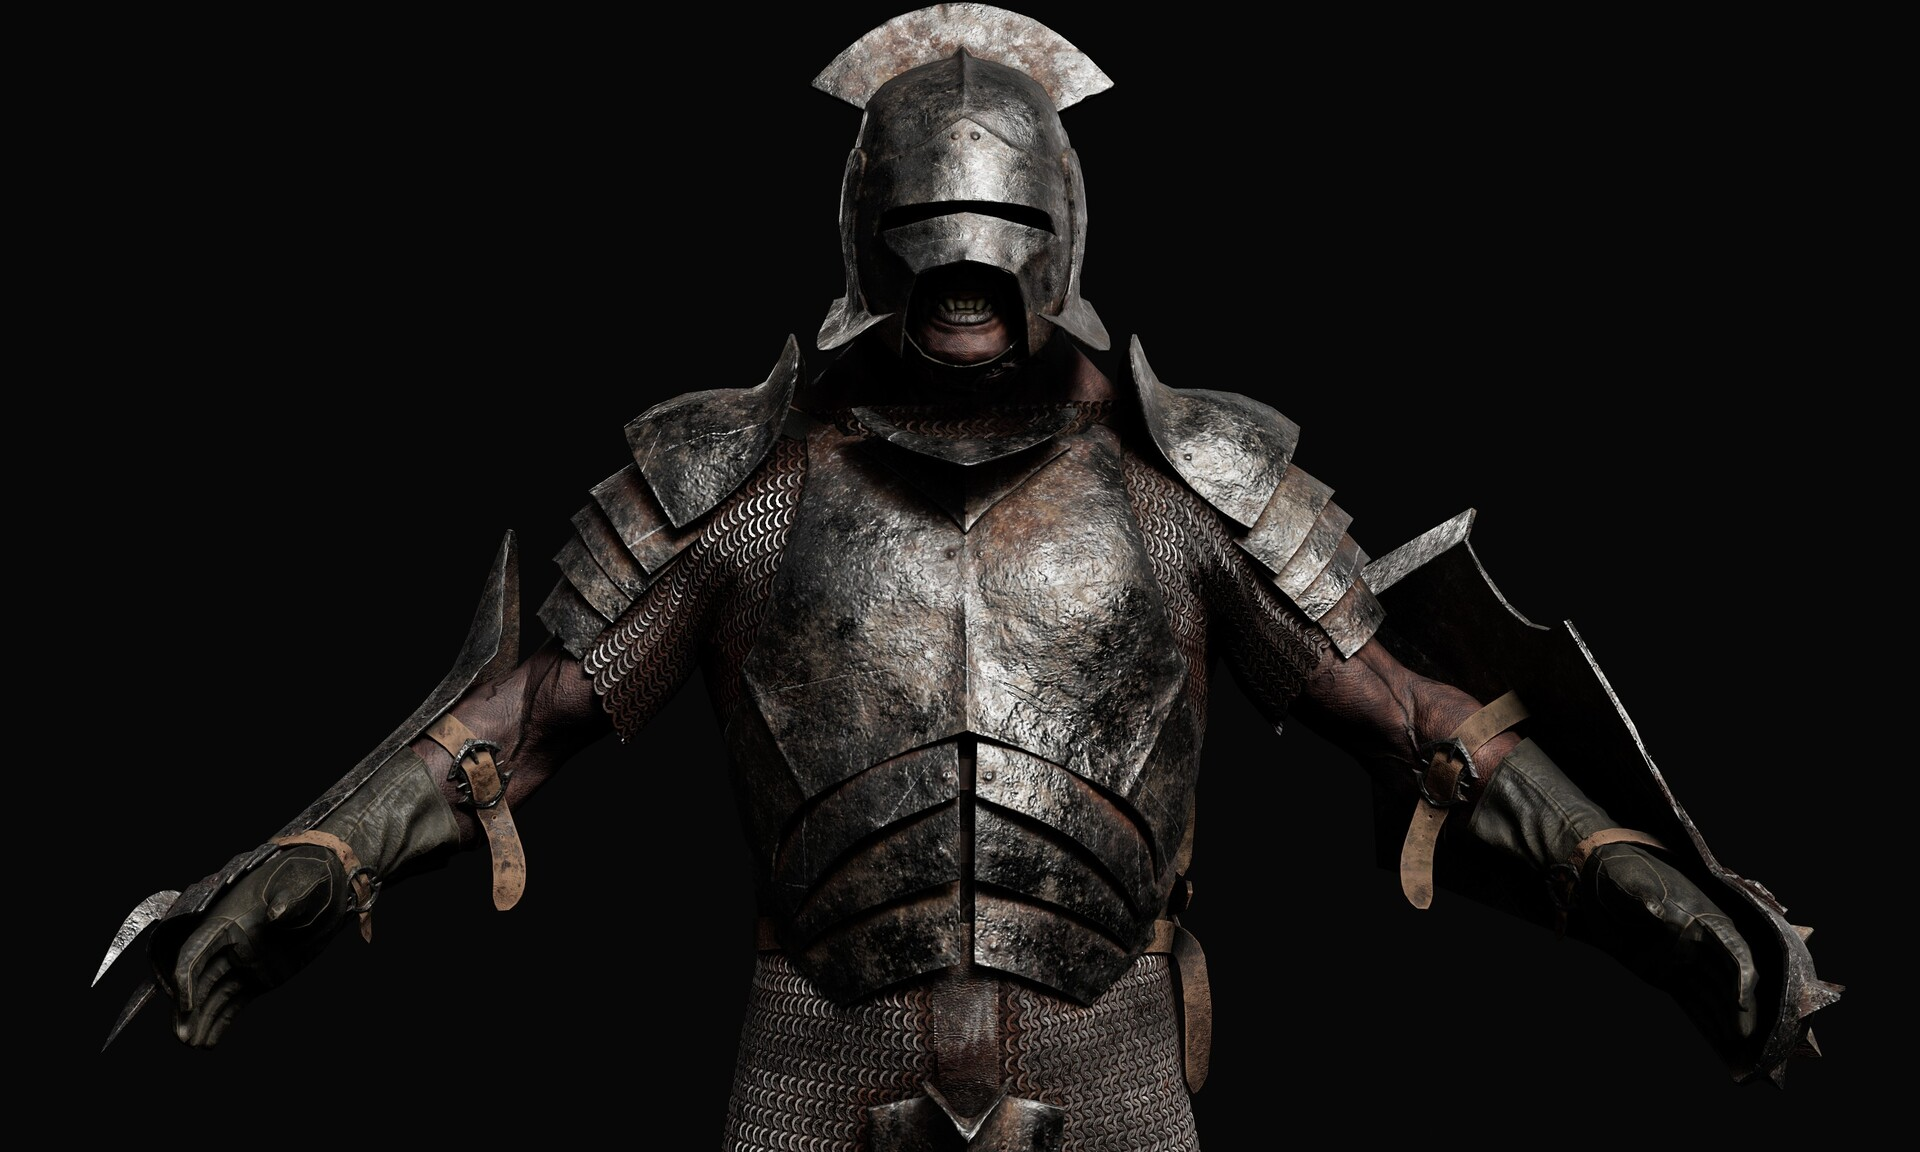
When creating a character the silhouette is one of the most, if not the most, important foundation to set at the start of the design phase. Through silhouette you can build the shape language and identify the key features that make your badass barbarian warrior stand out in the crowd.
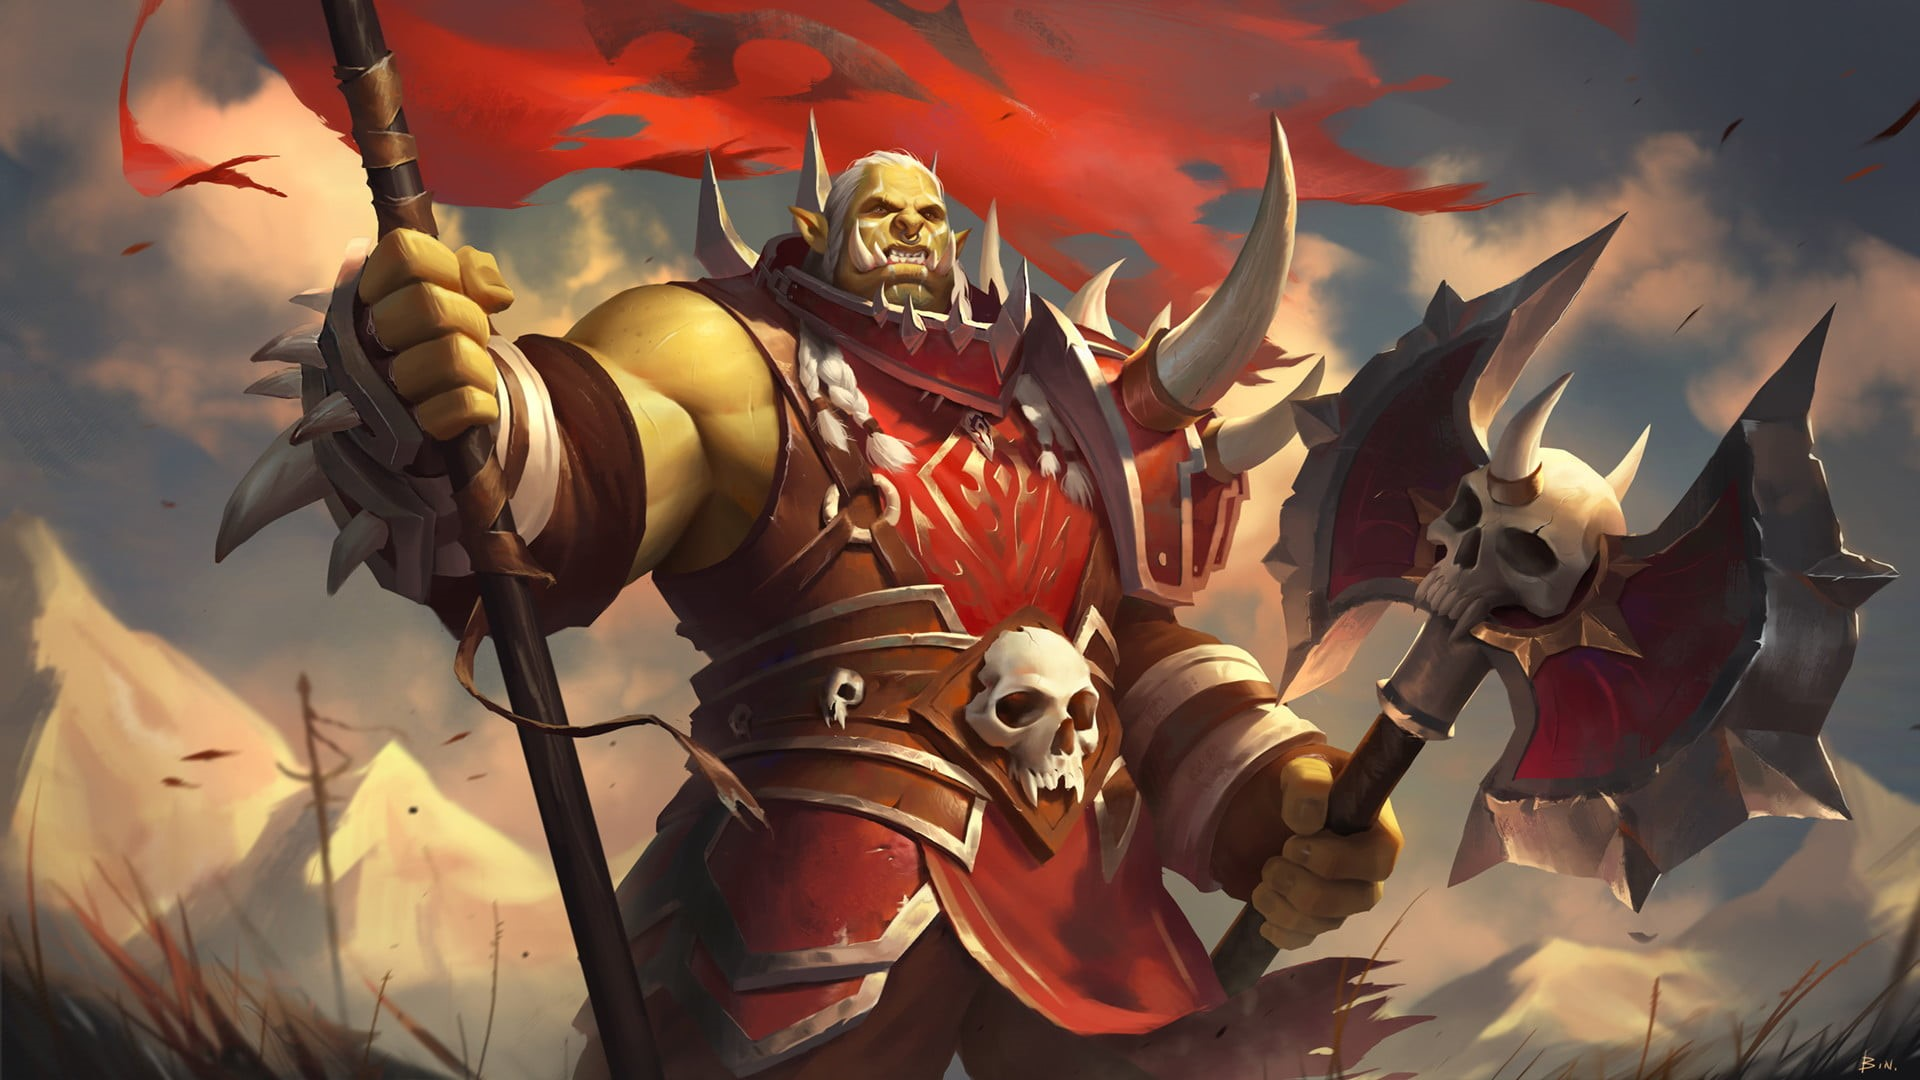
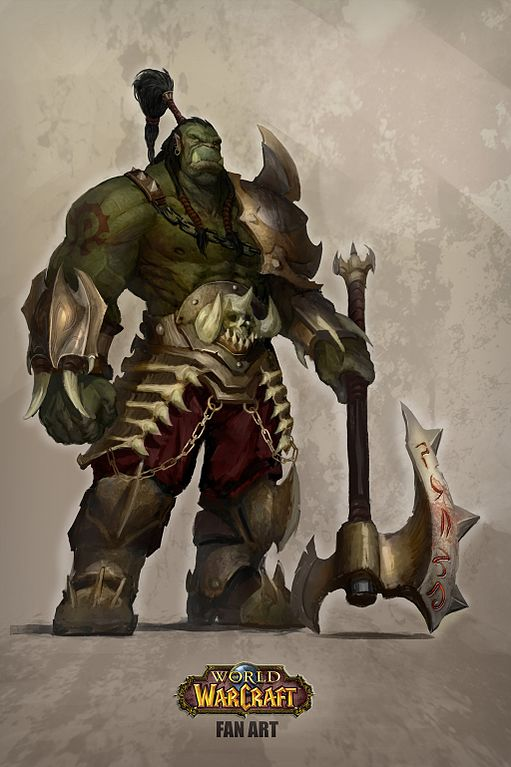
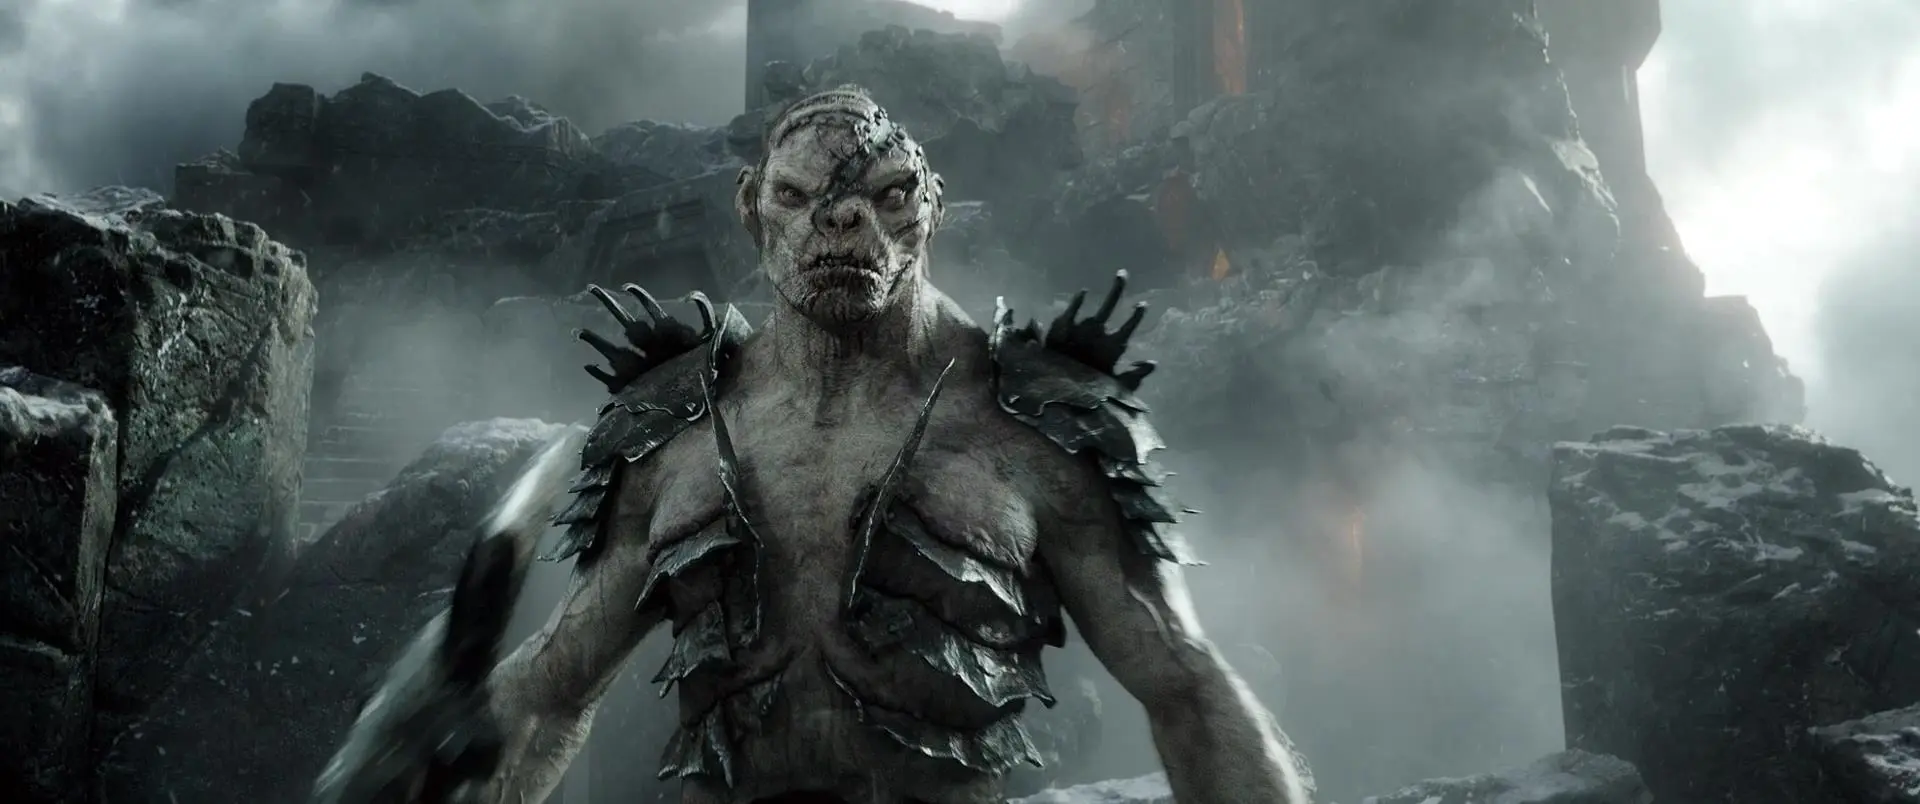
For this particular exercise I wanted to make a Dungeons & Dragons PC for a new one shot campaign my group was going to play. So I started gathering references of iconic orc depictions from World of Warcraft and Lord of the Rings.
The shapes used to create them are composed of mainly large squares and hard edges. Even if you were to show no detail in the center of each image, they captured the sense of danger the character brings to the table. I’m a fan of the cartoon proportions in Blizzard Entertainment’s orcs so I’ve stolen their hilariously large shoulder pauldrons, tusks, and greatsword. Tolkien’s orcs are menacing, which is not the archetype I want my heroic D&D character to display, so I downplay the influences of the famed servants of Sauron. But I do enjoy their faces, so I try to incorporate some of their facial features and scarring into my own design.
After some revisions, the shape of my orc comes together and I can start adding detail values to flesh out his individual armor pieces and decorative spikes. In the end, I’m happy to play this gentle giant at the table!
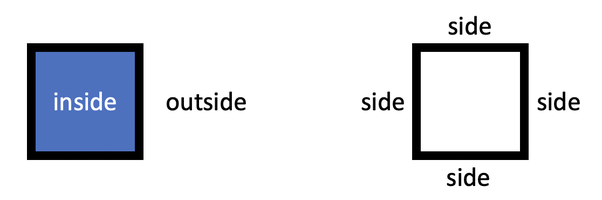
In elementary school, we were learning about shapes. We already had a good understanding of counting and numbers, but now we were introduced to terms like angles, degrees, and the names of different shapes.
One day, the teacher drew a square on the board and asked us how many sides it had. I was confident in my answer and raised my hand along with the rest of the class. When called upon, I proudly declared, “It has 8 sides.”
I don’t remember the reaction of my classmates or the teacher, but I recall feeling proud of my reasoning. The teacher, however, corrected me and said that squares have 4 sides.
Unwilling to accept her answer, I approached the whiteboard and drew 8 numbered red arrows pointing to the sides of the square, explaining that there were sides inside the square as well and that all shapes would have twice the number of sides we were taught. I was convinced that I had discovered something amazing.
“Doubtless, the life of an Irregular is hard; but the interests of the Greater Number require that it shall be hard.”
The teacher listened to my explanation but still maintained that the square had 4 sides, filled in or not. I wanted to continue the discussion, by pointing out that a line also had 4 sides, with a width on either end that couldn’t be ignored.
Although my argument was met with frustration from the teacher and probably my classmates, I was undeterred. I loved learning, but I also loved debating and breaking down the material to its “rules.” If the rules seemed inconsistent, I sought clarification.
This was my first encounter with the realization that rules are not always consistent and that there is always room for exceptions.
The lesson I learned extends beyond the classroom and into real life.
The rules of math, grammar, and life itself are not always absolute and there is always room for interpretation and exception.
Could they fit and live in a volcano, or be making a home in your living room chimney?
The scale of a creature can sell the believability of the design.
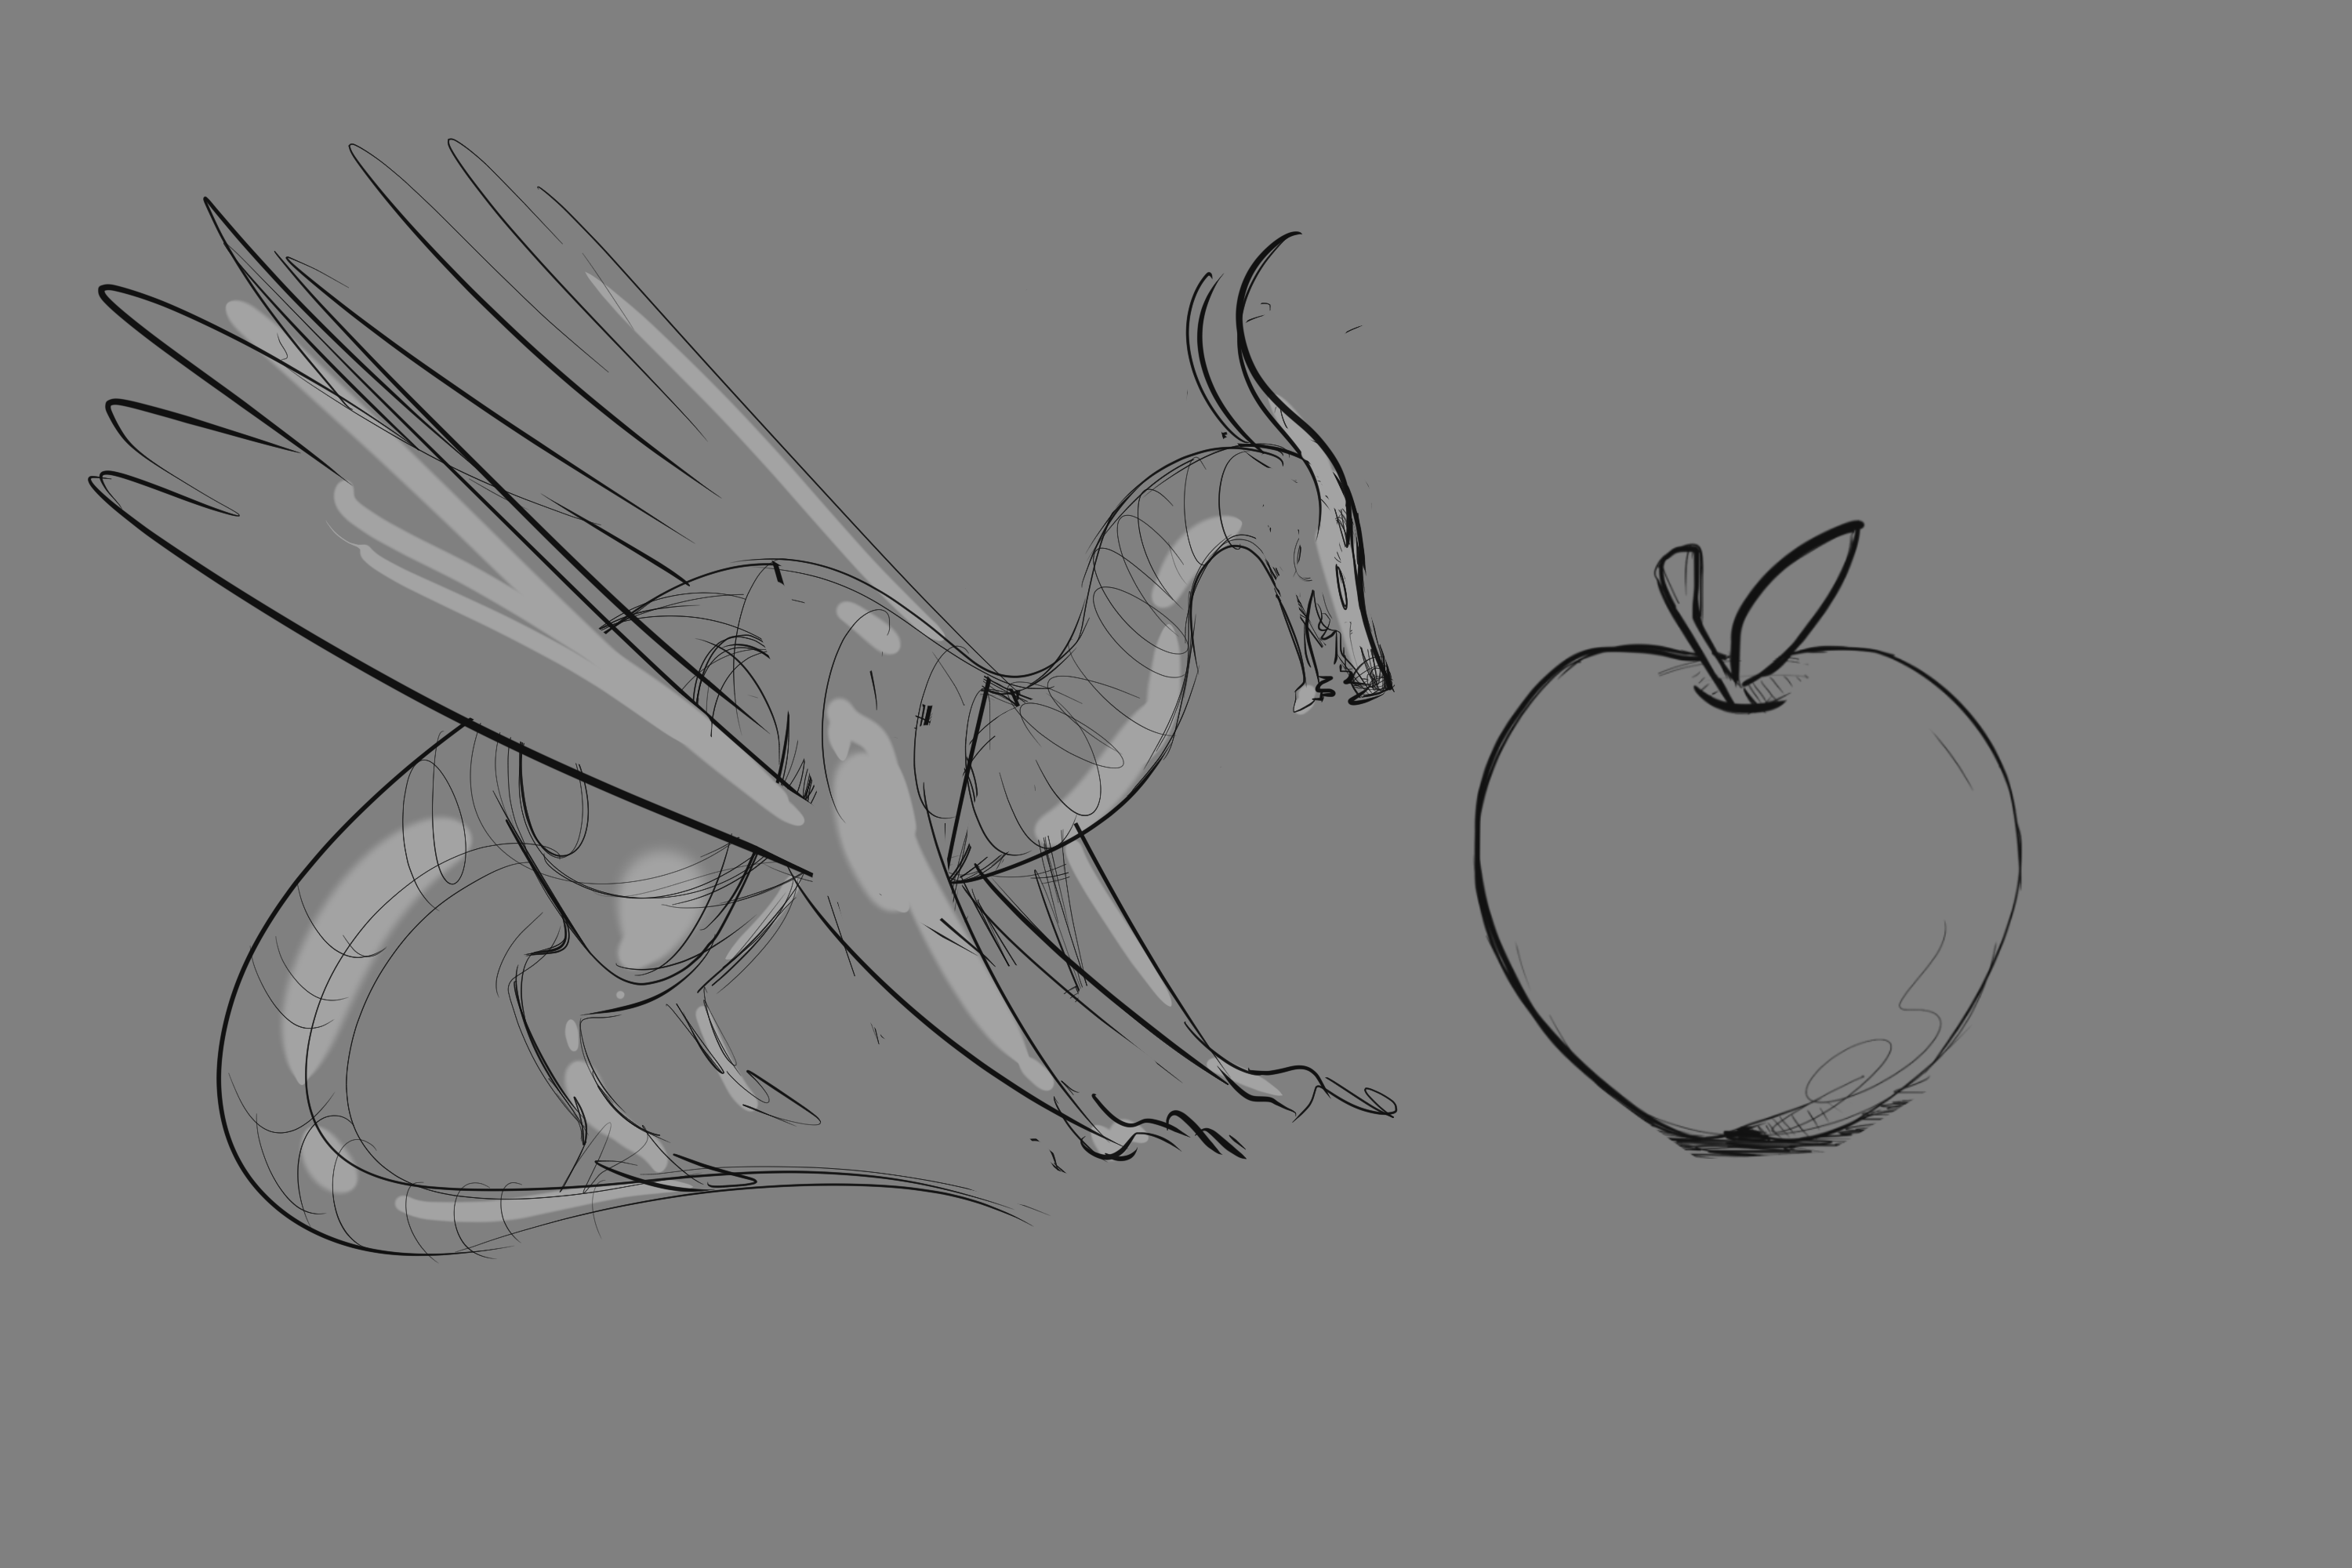
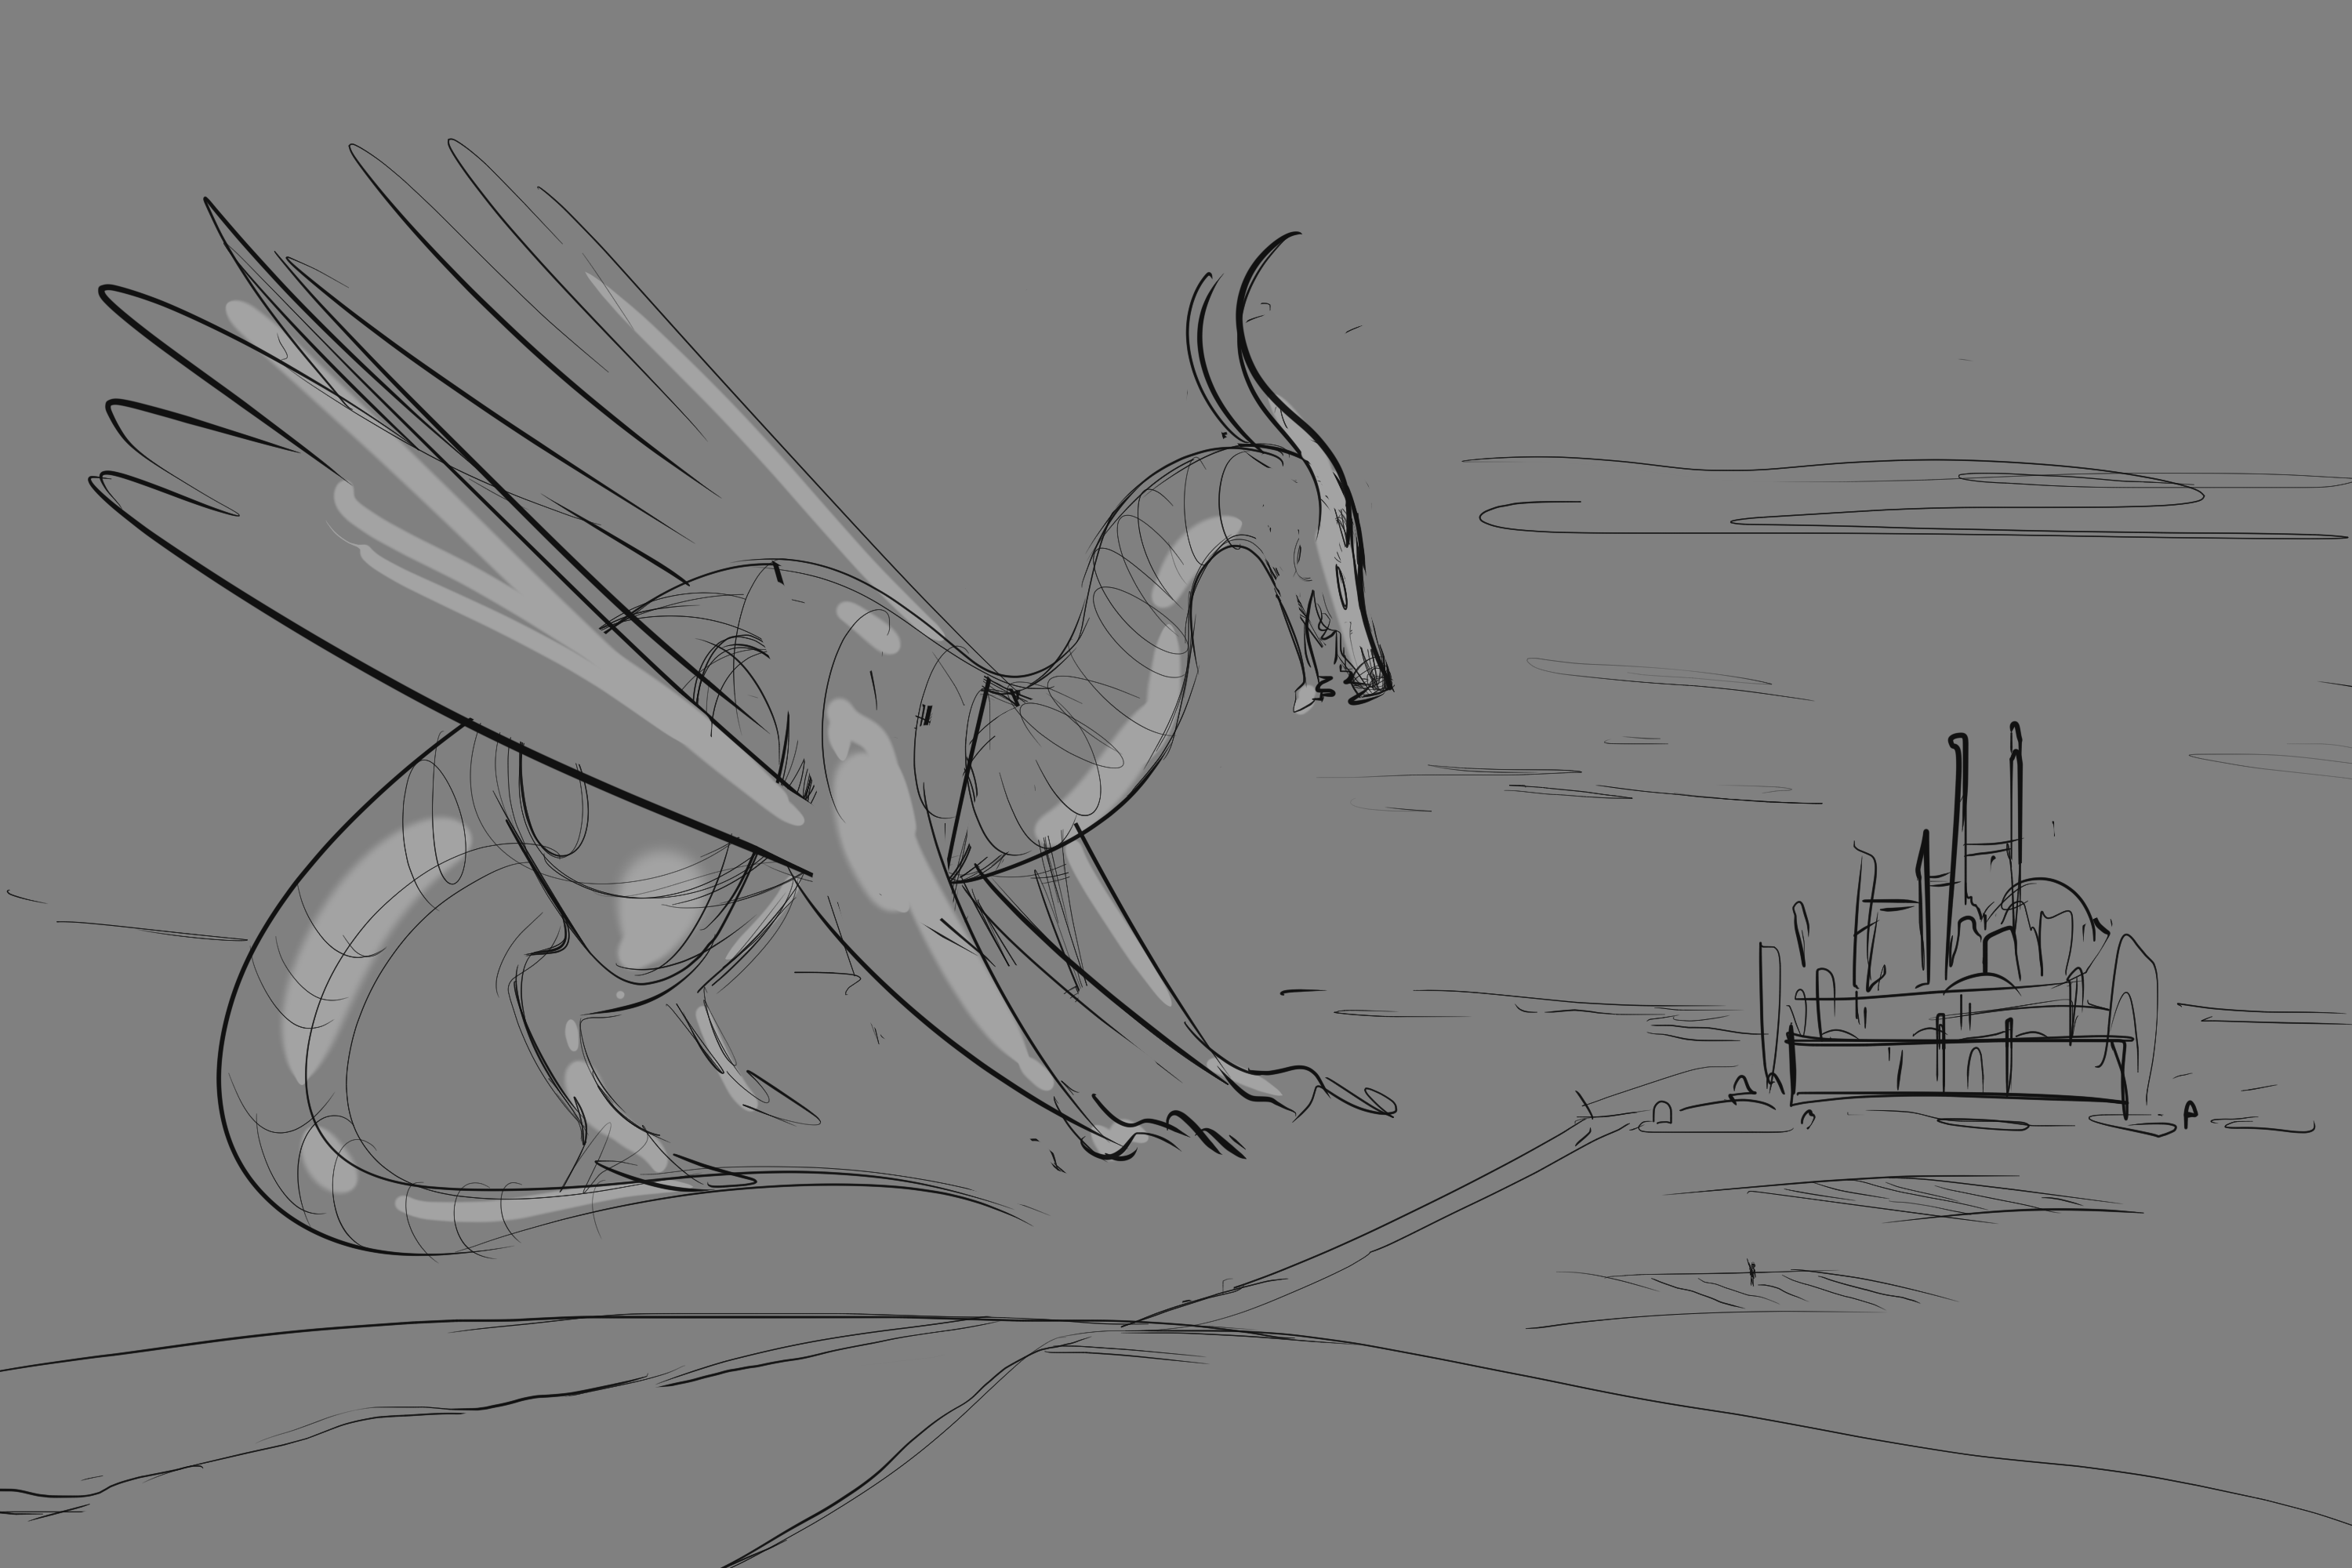
Scale can’t be shown without a reference point. It’s simple enough to place a black human silhouette in the corner, but we can tell a story with the environment to make it invoke more emotion!
If the dragon is positioned near an apple they appear to be the same size and in the viewer’s mind the creature is small enough to perch up on their arm.
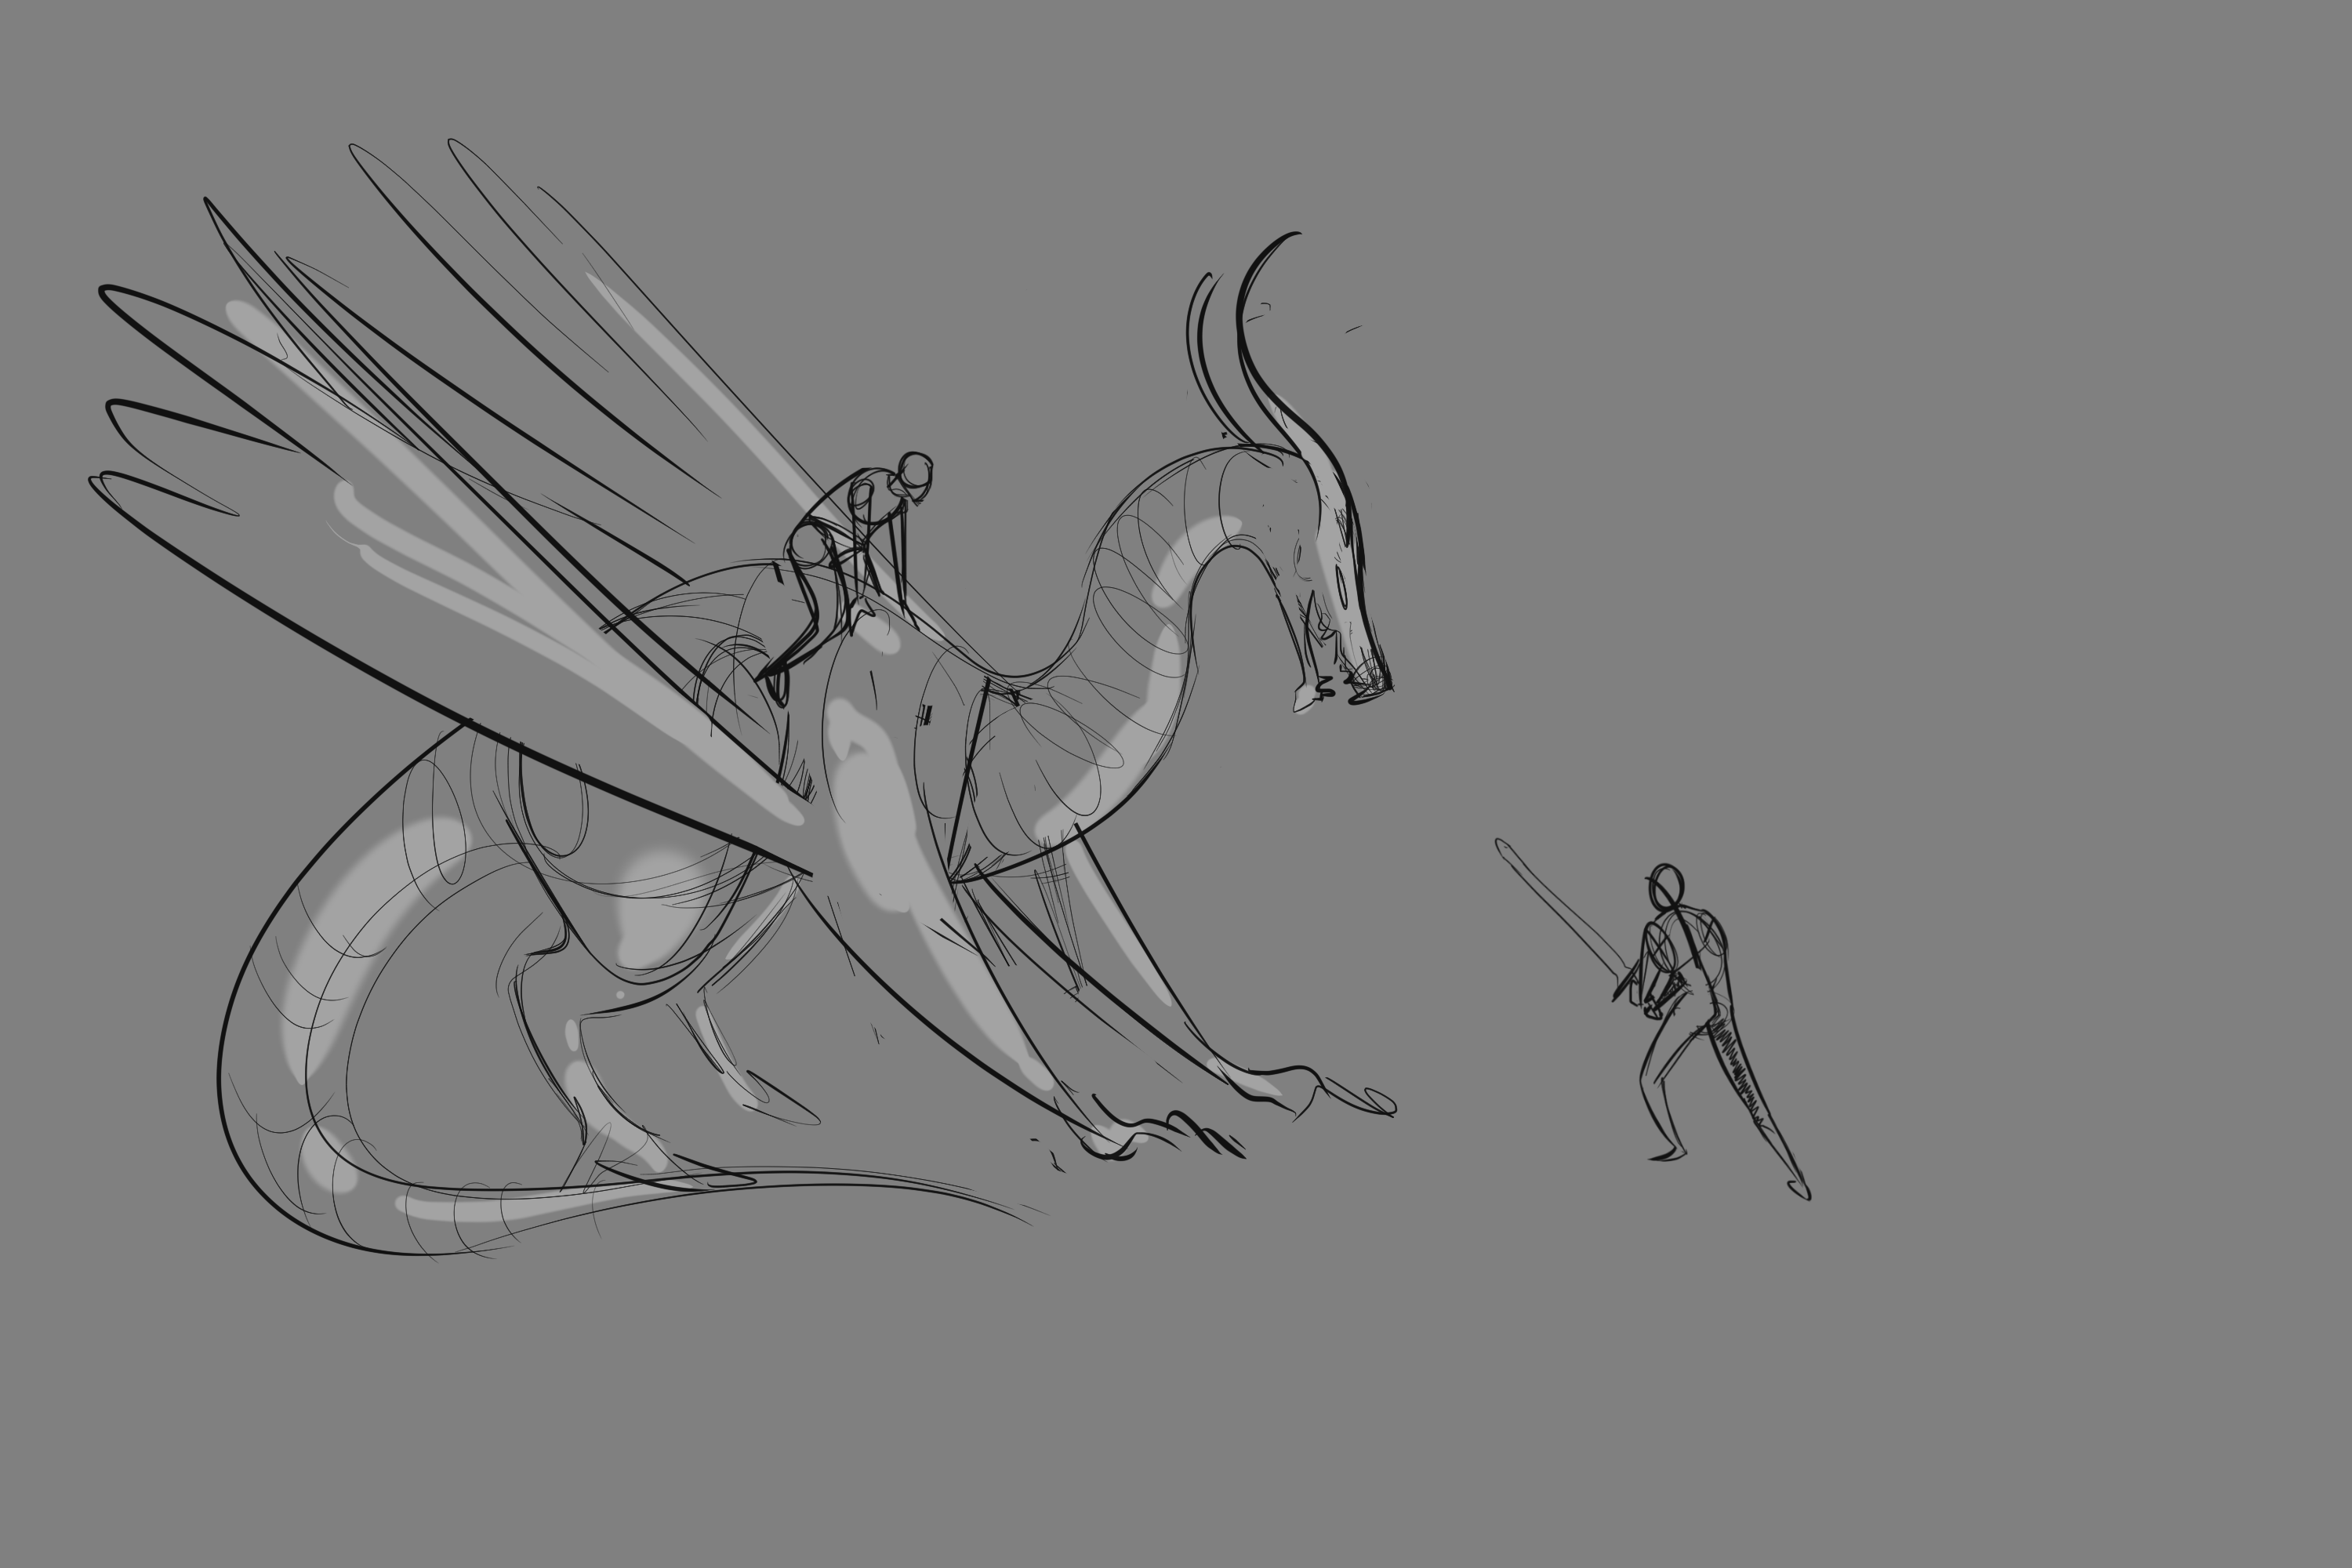
However, if we change the entire context of the image and the viewer’s mind now sees the creature as a formidable foe to vanquish!
By placing the creature within a landscape environment, the scale of the creature appears goliath.
In each of the above examples, the dragon is the same size, and the objects around it determines the scale.
We can get an even grander scale representation by adjusting the dragons and their scenery to be relative to each other as well.
There are endless possibilities to explore when it comes to demonstrating your design’s scale, and it’s the perfect chance to show your personal flare and creativity.
So ditch the lazy human silhouette and explore some environmental storytelling!
Now, I’m no expert in costume design, but I know for a fact I can’t just leave my characters nude (though I suppose there is a niche audience for everything.)
And the idea of an order of a dragon cult that has an order of knights sworn to protect and fight for them sparks a childlike interest for me.
The first thing that came to mind was the leather hide armor donned by fantasy Vikings and barbarians.
For knights and warriors who would be dealing with dragons, it only made sense that their gear would have to have a fire resistant element. AKA it would be best the main material used to craft is was made from the very skin and scales of the dragons they safeguarded.
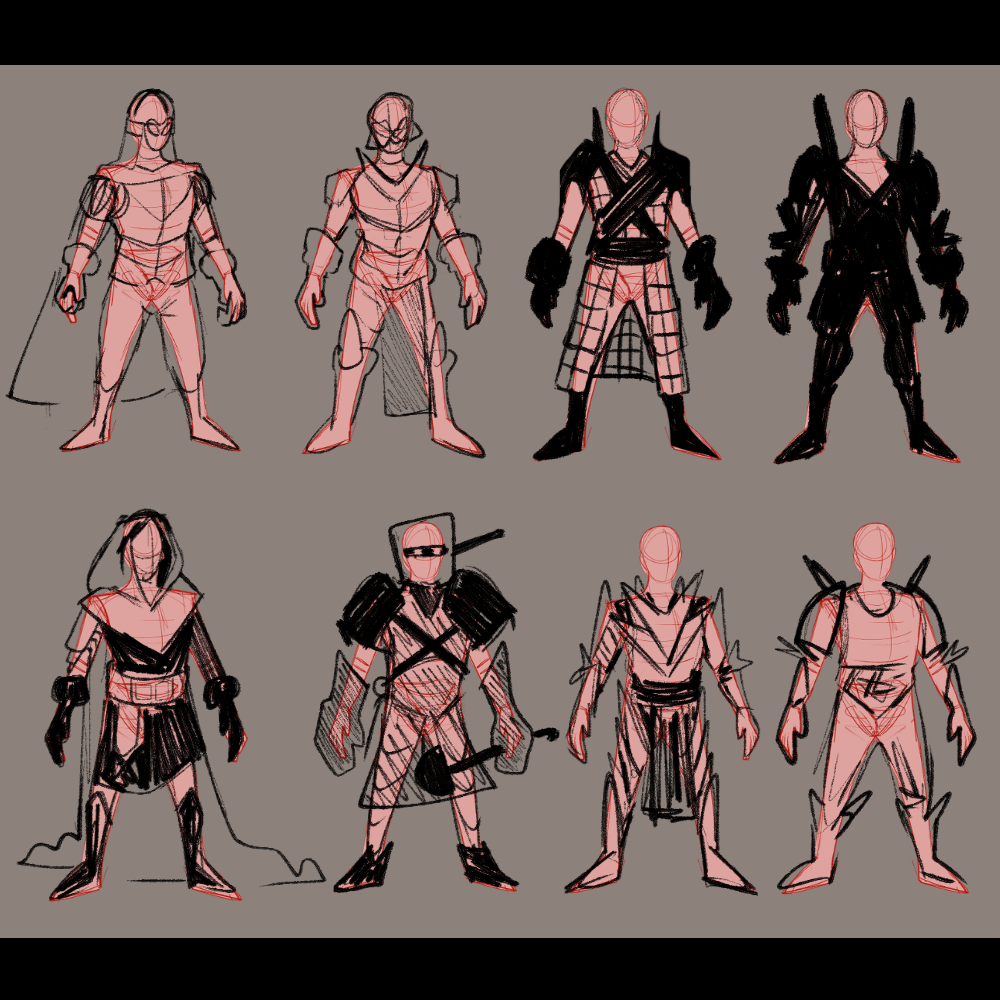
I created a base mannequin to play dress up with and experimented with some different variations. As long as I could say my mannequin looked protected, it got the pass.
And a good giggle.
Pots aren’t good helmets, it turns out.
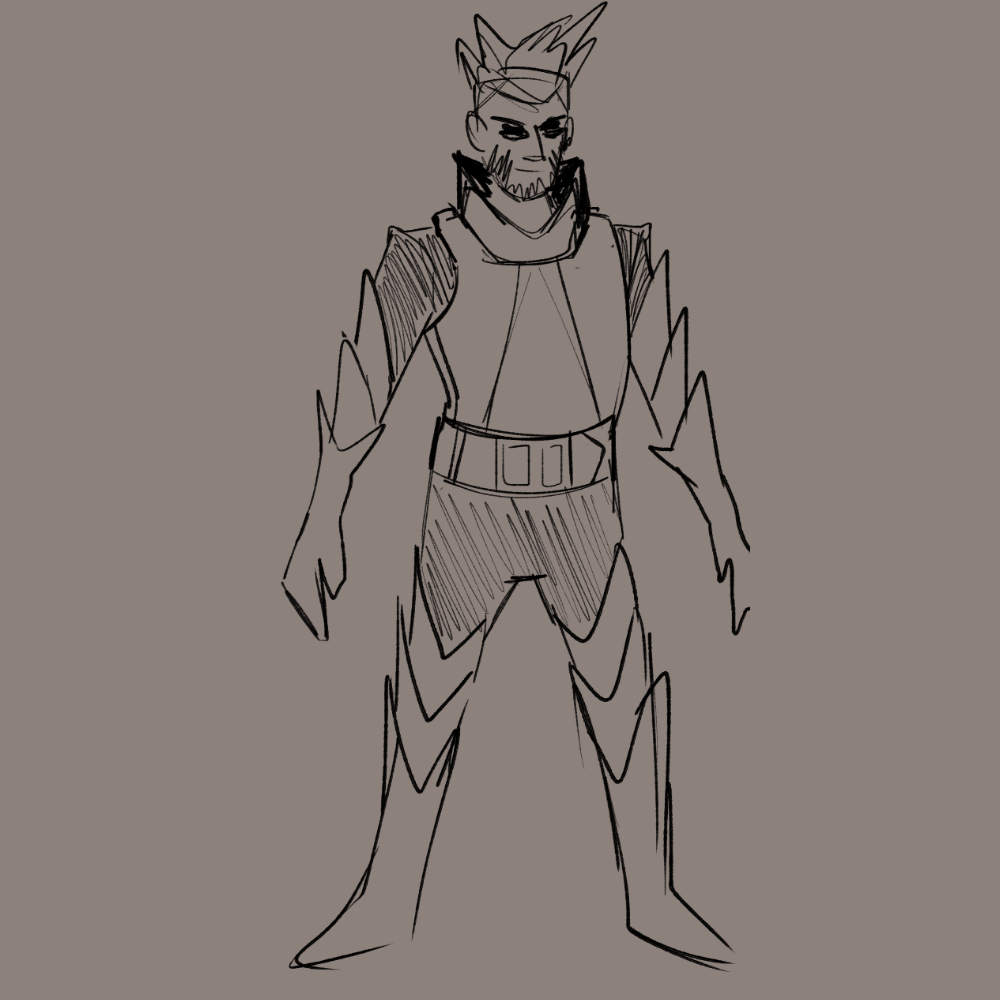
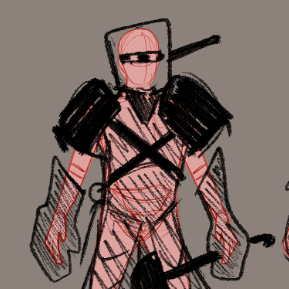
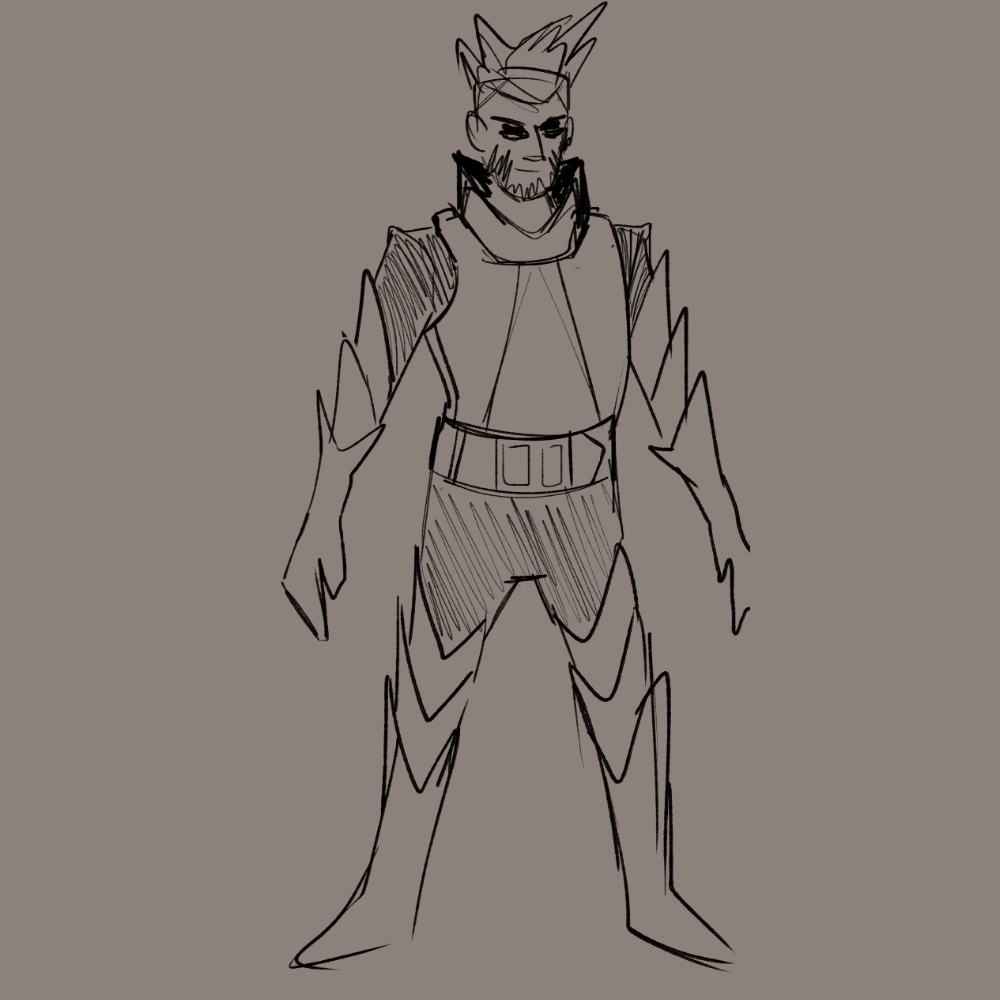
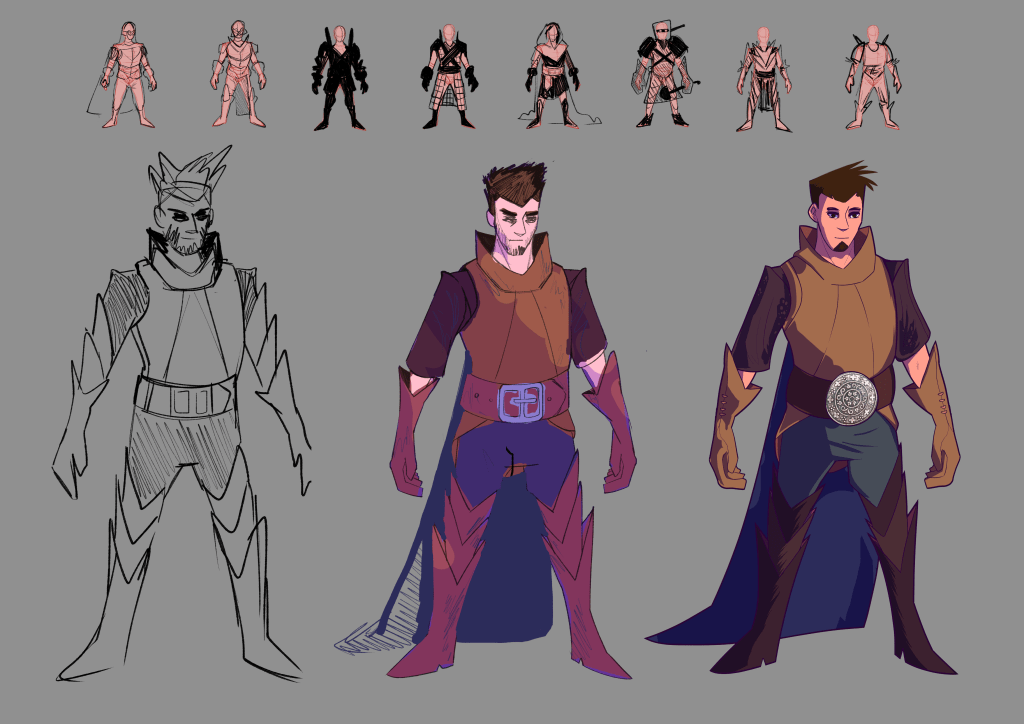
With the thumbnails all lined up, I threw together a rough sketch of what I’m initially digging. I’ve dropped helmets altogether. Honestly I think each piece of equipment deserves it’s own study, but of all the accessories the helm is the soul of the armor, so it needs an entirely dedicated post and set of research.
I went with a high collar breastplate, and triangular layered gloves and boots with a thick belt.
Wow. Much draw, so impress.
I’m a fan of spikes apparently, but I do tone it down in the refined sketch.
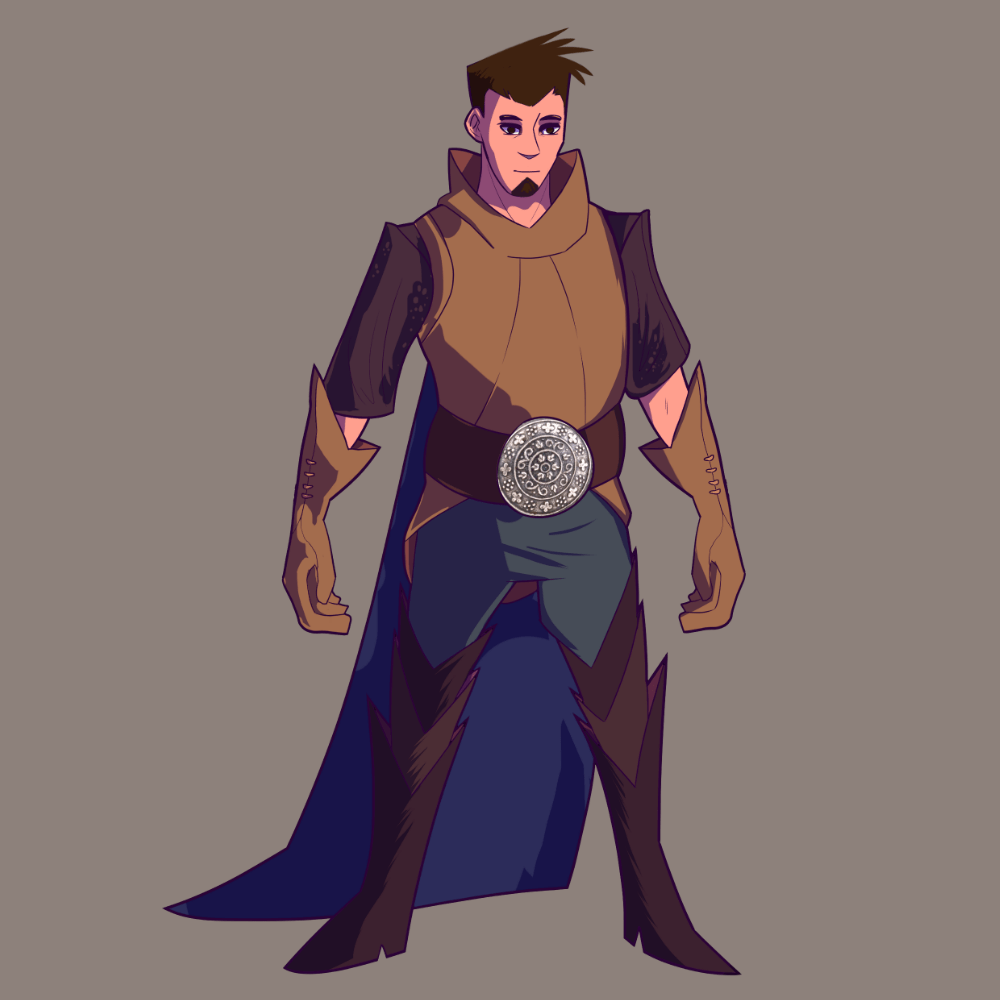
I decide to include a cape in the design as it adds potential for cloth dynamics and can be affected by the gravity of the world he exists in.
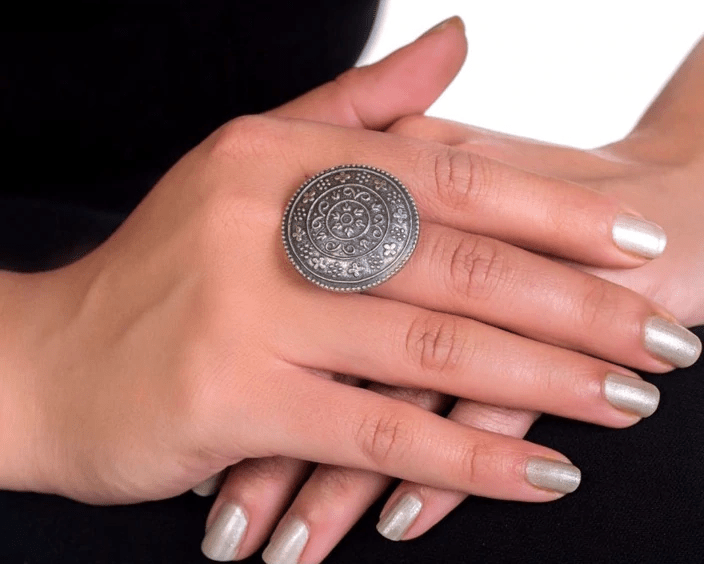
I felt some changes to the belt would be necessary, and by going with a circular shape I can guide the viewers eye around the image.
The texture I use for the buckle is from an image found on Google, it’s a ring in fact, and you can buy it if you’re inclined (I don’t own the shop, nor do I know the person who owns the shop, and I don’t benefit in any ways from the sale of the ring, I just wanted to let you know in case you like it.)
For the inks I used a 8px inking brush to do the outline, and the same brush in 5px to do the inner lines.
I hope the post was informative or at least interesting. If you liked this please consider leaving a comment, like, or sharing.
What gives a character their personality? Is it the clothes they wear or their mannerisms? One could say there is little difference between the two. A person chooses what they wear normally as an expression of themselves.
But a character in a story be it movie, comic, or video game wears what they are given by any such creator of their world. Potential creators should consider the personality types of their subjects, beyond their occupation and into their unique quirks and beliefs.
There’re some key questions I like to ask myself while sketching a character for the first time that help me identify the archetype and personality I’d like to shine through. Keep these 5 questions in mind when giving birth to your concept and let the art flow from your brain!
When they wake up in the morning, what are the first movements or actions they take?
e.g. I always slam the 10 minute snooze, make a hot drink, then do some stretching.
While they’re completely alone, with no contact with the outside world, how do they feel?
It may be loneliness and a desire to find company to entertain or be entertained by with haste, or perhaps they are comfortable in the solitude and seek a solo activity to keep them occupied.
What does their living situation look like?
Do they live with family, classmates, roommates, comrades, or alone?
Are they good at keeping their living space tidy, or live in organized chaos?
How do they recover from fatigue caused by their occupation?
Do they work a physically or mentally demanding job?
What are the consequences of failing to perform at their occupation?
Does the thought of failing cause them mental anguish?
If they were visited by someone they considered a personal hero, what would their reaction be?
Admiration is a common emotion evoked by meeting a personal hero, but what if they were not as great as your character originally believed?
If a character based their lives around the image of their hero, and they were betrayed by reality of the person under the mask, would they tear the posters of their beloved superstar and reject all associations with the identity they built up around them?
This one is for the anime and manga nerds out there: Would the impact of discovering All Might had a hidden dark side to him at a pivotal moment in Deku’s schooling be strong enough to dissuade him from hero work?
Think of the above as a quick start to a mind map for your character’s personality, ask as many follow up questions as it takes to flesh out how they would react in any situation. Discover their motives, fears, and childhood traumas by reasoning with yourself to get to the root of their personality.
When I am overwhelmed with the urge to draw something, usually I am at a loss as to what I should draw.
The ‘image in my head’ is too vague, and my imagination has way too high expectations for what my hand can translate into a drawing. For some, it seems they can just pop out a good design, in a good pose, in a good environment, ink and color that bad boy and BOOM. Art.
Maybe I’m just not practiced enough to be able to do that, maybe I don’t have as clear an image in my head as they do. But what I do have is an idea and a strategy.
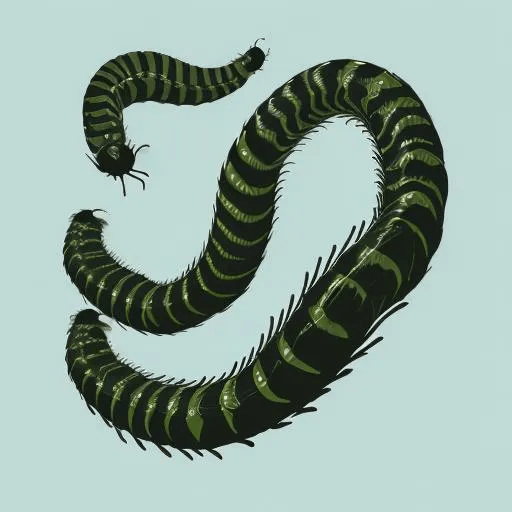
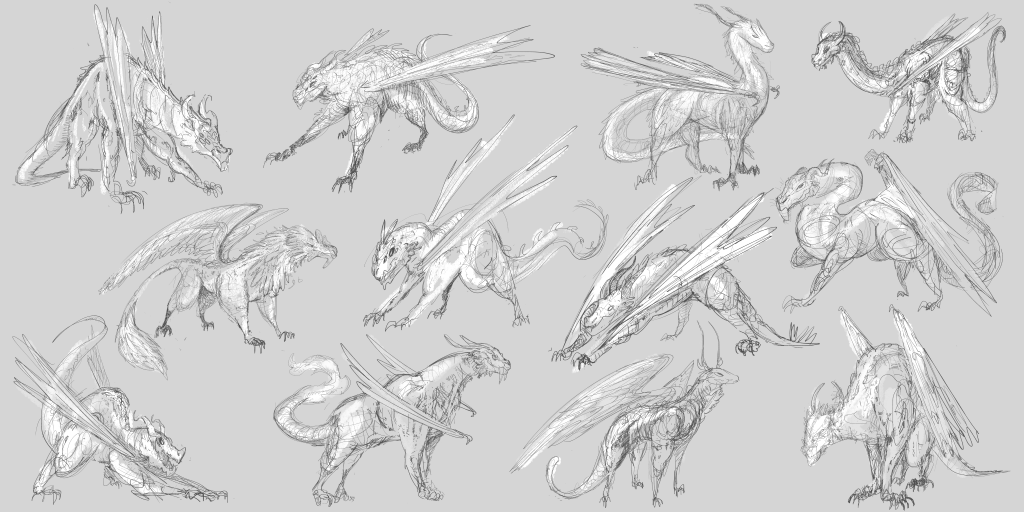
The idea: dragon
Simple true, but I’ve had a few subsets of ideas I was eager to explore within the simple concept. What makes a design a dragon? It is going to need all the basics, a body, head, limbs, wings, and a tail. So all of these have those.
The safe bets for what will immediately read as a dragon have been referenced from lizards, fish, and dinosaurs.
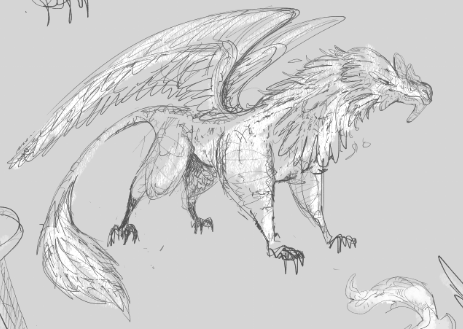
But what I found out pretty quickly is that that’s not all it takes to make something read as a dragon. The following “dragons” were referenced from more mammals and birds, and read as more creature or beast, but at first read I probably wouldn’t say dragons.
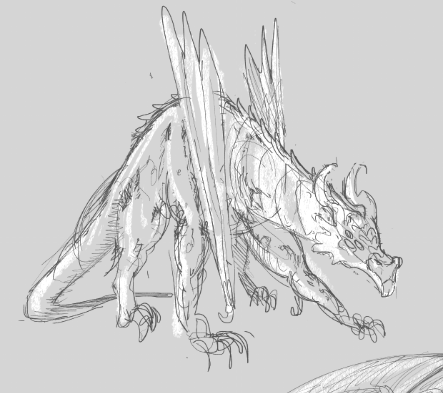
I’m most fond of the first sketch, which was mainly referenced from prehistoric saber tooth cats. I think the body shapes are pretty fun, and I love a top heavy creature. I gave it the flappy bat wings, to push it back to the dragon territory, but I don’t think I really succeeded in doing so. Still, a cool creature I’d like to get back to some day.
The feathered wings were a fun exploration but ultimately made both designs read more like griffins or hippogriffs.
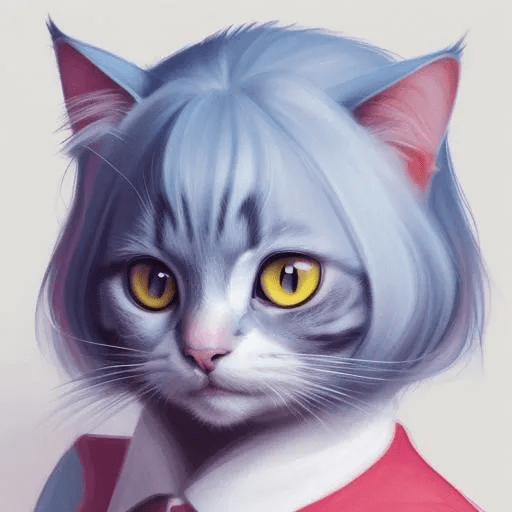
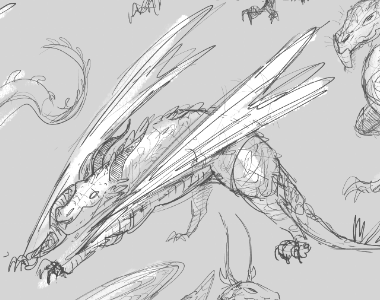
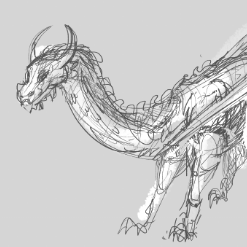
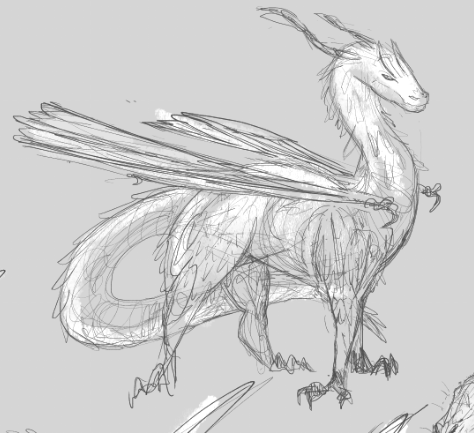
The middle design, slender and sleek, was referenced from deer and antelopes which gave it a body that looks pretty agile and fast as well as some very pointy antler-like horns.
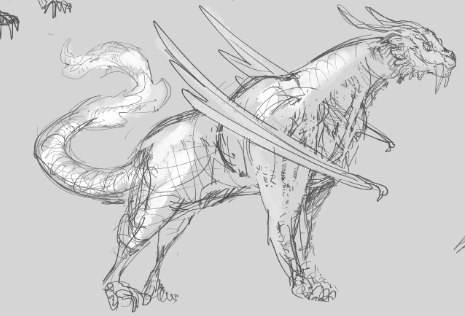
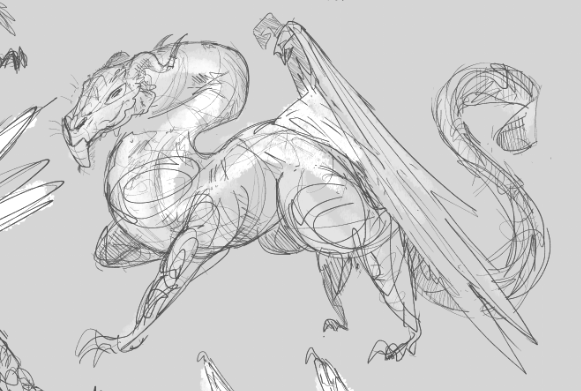
It’s counterpart is bulkier and carries more mass overall. For this design I referenced various big cats for the body, and I thought a chicken would be fun to use for the head because of that thing that dangles off their faces and their combs are pretty awesome. I thought if I explored this design further I’d definitely use more chicken references.
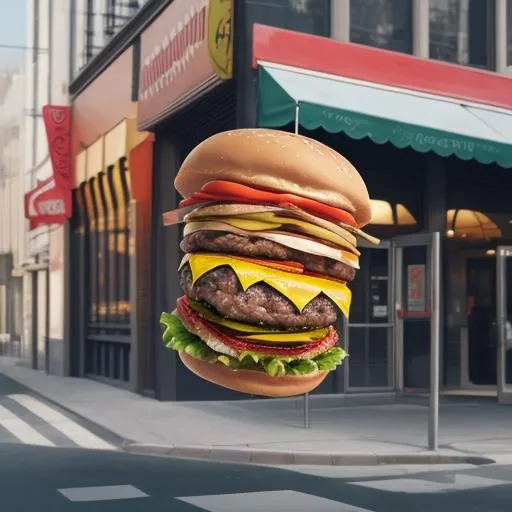
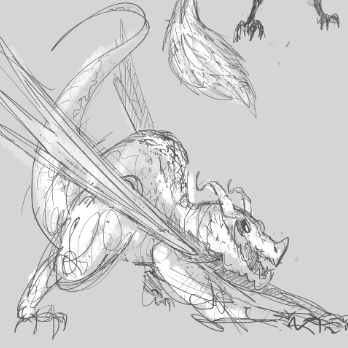
These guys are weird. I do feel like they all read as dragons but not quite the way I would typically imagine a dragon. I’ll give a brief breakdown.
The first and second designs shown here are not my favorites in the batch, but I can appreciate some of the ideas I explored.
I do like the attitude in the first design, I think it has a lot of personality in the posing and face. I named his layer “posh dragon” because he felt kind of proud and is holding himself well.
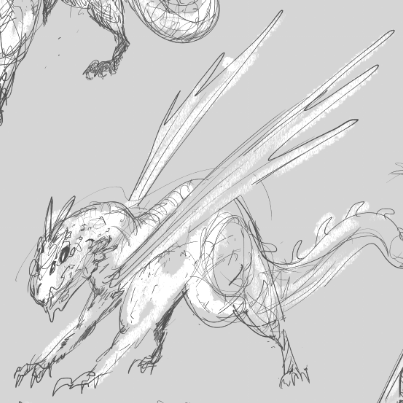
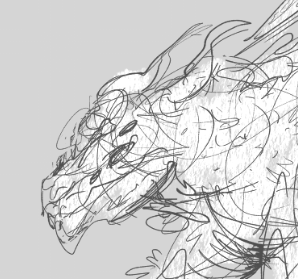
The second design, was actually the last dragon I drew for the exercise. You can see I’ve run out of steam here and I really feel like I lost the head and face. If you put your thumb over his face the rest of it isn’t so bad, but for characters and creatures your eye naturally goes to the head first, and if it doesn’t like what it sees… it won’t even give the rest of it a fair chance. So throw your thumb over that bad boy’s face and see for yourself!
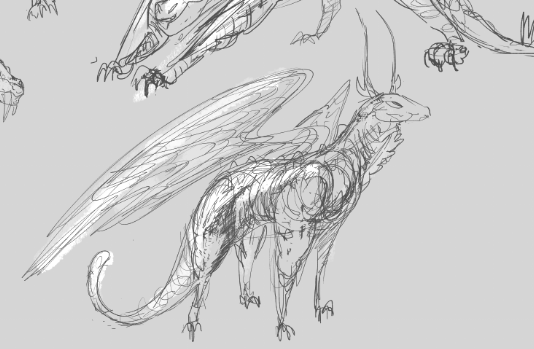
The last design shown here is actually the first sketch I made for this entire exploration, and I love it. I really do. I think it’s great, it has 6 eyeballs, a long skinny tail, big flappy wings, and a smirky little face. I mean come on look at him!
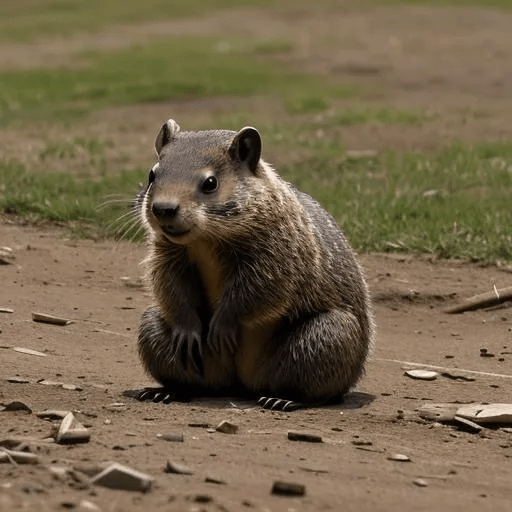
I referenced pet rats for him, because they are so cute, and I just wanted a friend.
so cute, definitely friend shaped!
So that’s it, I’m going to narrow these designs down to just a handful, and do a second design pass! Let me know which designs you think should make the cut!